Page 1 of 1

[GIMP] Texture Overlays for Land and Sea

PostPosted: Wed Oct 07, 2009 1:11 am
by jleonnn
For me, I just use bucket fills. It's just a blank patch of colour with lines. How do you make a better looking ocean or land? All the maps I see have at least some kind of grunge or something, but I don't get how to add it in. I'm using gimp btw.

Re: How do you make lands or seas?

PostPosted: Wed Oct 07, 2009 9:33 am
by RedBaron0
There are a lot of way you can do it, but it will usually involved lowering the opacity of 1 or multiple layers. On the layers channel select the layer you want to change the opacity to and slide the slider at the top of the layers window until you find the balance you like. You'll need to find an under or over layer to blend with your color, a wave pattern or gritty land texture for example. That layer you'll have to change the opacity to as well. Just fiddle with the slider on all your layers until you get the desired effect.

And don't be afraid to try anything, those filters in GIMP do some crazy things and playing around with them may give you another kind of inspiration when working on some other aspect of an image! The best why you learn with this software is to totally wreck images. ;)

Re: How do you make lands or seas?

PostPosted: Thu Oct 08, 2009 4:36 am
by jleonnn
thnx. But what's opacity and how do you get there and how to get the textures?

Re: How do you make lands or seas?

PostPosted: Thu Oct 08, 2009 5:16 am
by jleonnn
I get the filter part but don't get the layer part.

Re: How do you make lands or seas?

PostPosted: Thu Oct 08, 2009 10:35 am
by RedBaron0
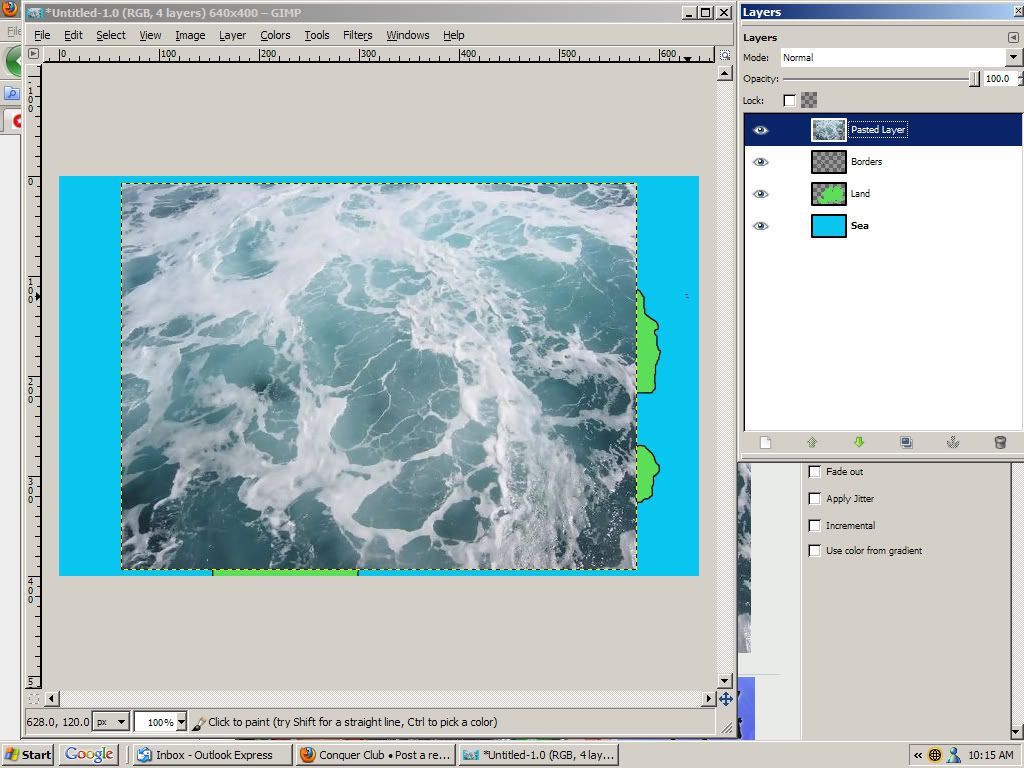
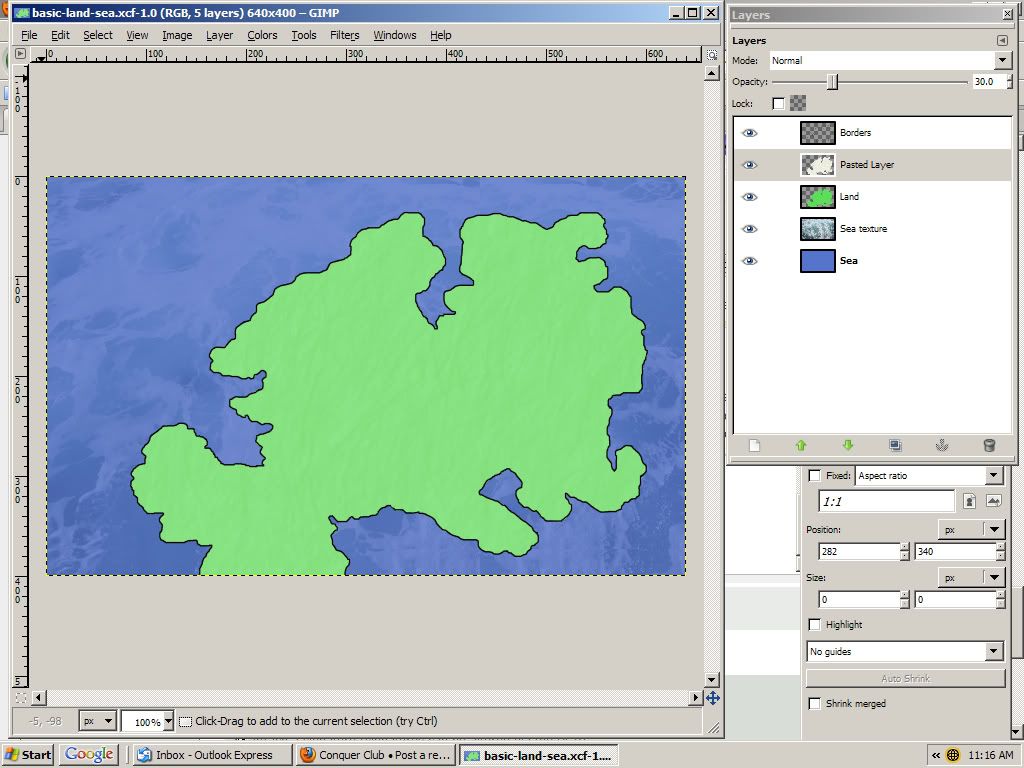
Okay, lets start then with a basic land and sea color. From the image you'll see that there is 3 layers, land, sea, and borders:

Click image to enlarge.
image


Lets add some texture to the sea first. I found this ocean image on the net:

Image

So I paste it to my image, right now it's on top, so it covers everything up.

Click image to enlarge.
image


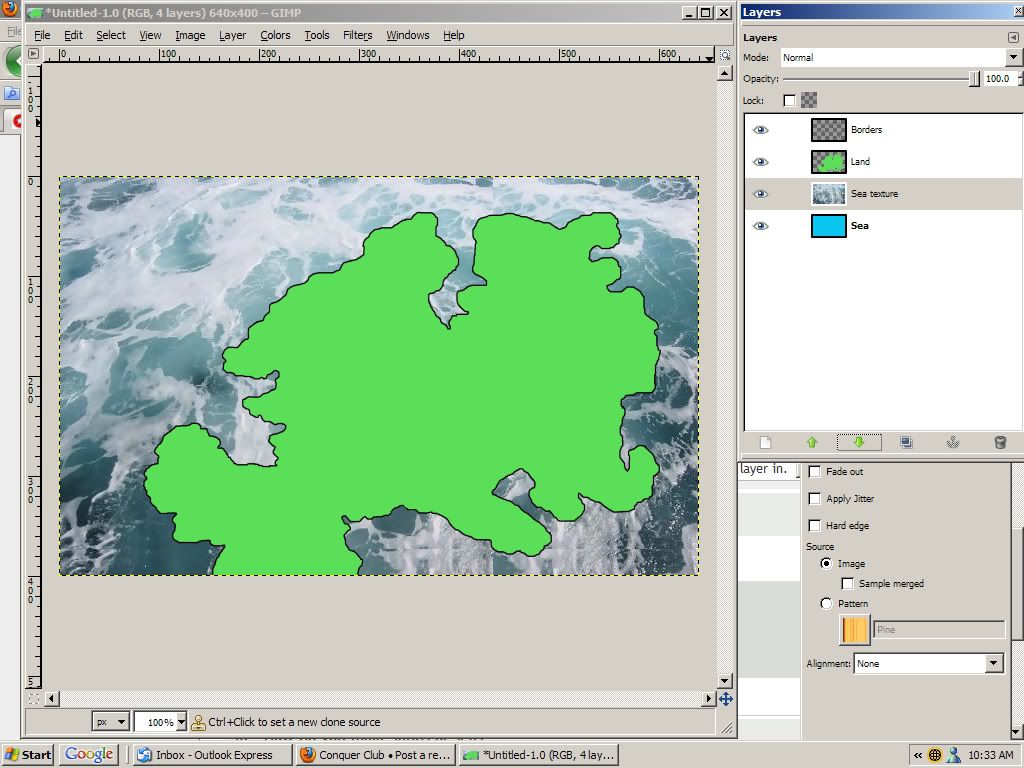
We need to do some things to the pasted layer, first I'll rename the layer, sea texture. Second the layer is to small, so we need to make it the same size as the rest of the image. In this case the image is smaller than the map so we need to make the texture match the size of the map. If the image you select for a texture is bigger than your image then you don't have to do anything, but you could cut out extra or scale the layer down to the size of the image if necessary.

There are a couple of ways to make the new sea texture the same size of the image. You can scale the image up to the size of the map. This is okay even though usually when you scale images up you're image will get a little blurry as the computer has to add pixels to make the picture bigger. We are going to basically blend the texture with the sea color so the detail isn't going to be that strong. However, it's just as easy to make the layer the same size as the entire image and then fill in empty space by copying parts of the texture and filling the rest of the layer in.

Once the sea texture fills the image we need to move it into the proper position. Use the little green down arrow on the layers channel to move the texture below the land layer, and above the sea layer.

Click image to enlarge.
image


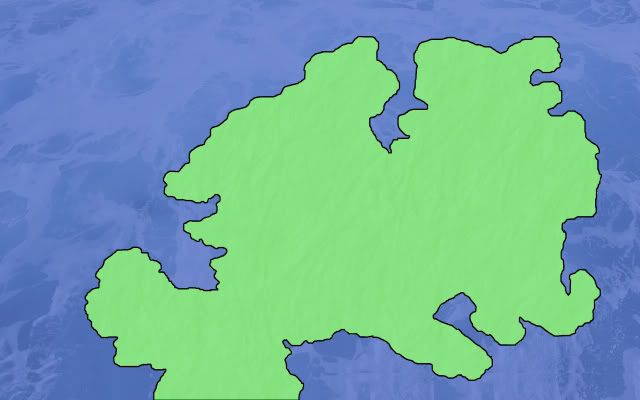
By dropping the opacity of the texture to 30% the blue color of the sea shows through. Again this is one way to do it, you could do it the opposite way with the color on top and the texture below it, and lower the opacity of the colored layer. This is where you need to decide on things, is the color right? Does this texture work? Does it look like the sea? Honestly I like it... but the color probably needs to be different.

Click image to enlarge.
image


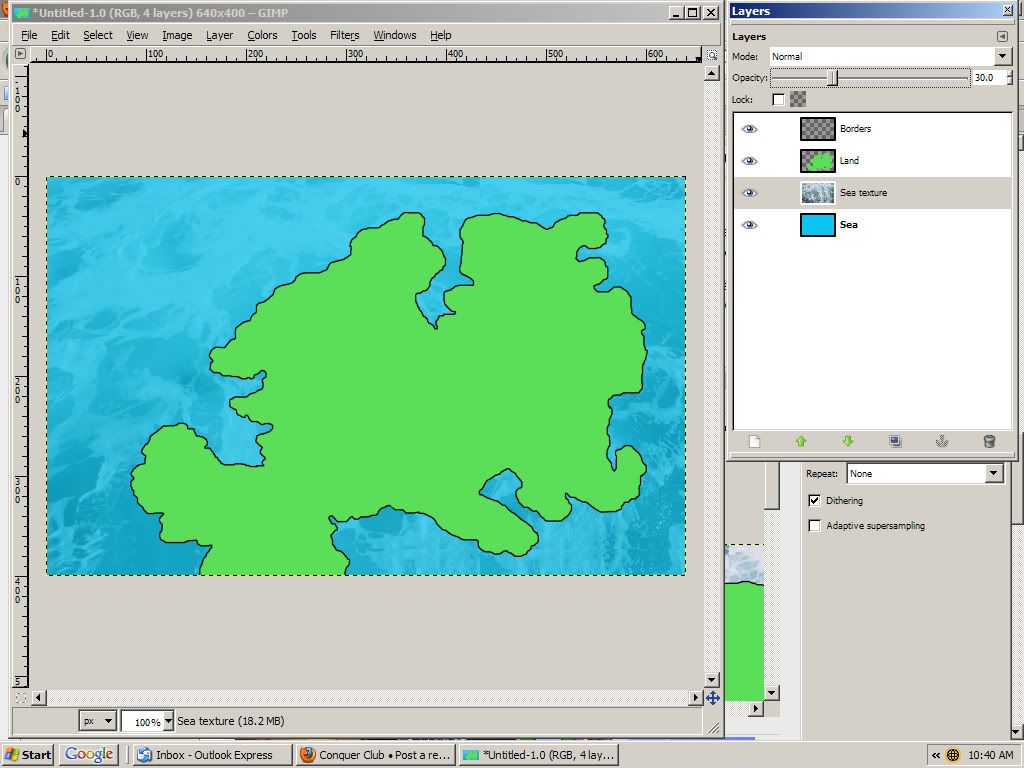
I'll change the color.... I found a purplish-blue that I like with the texture, you'll see it with the next image.

So you now can repeat the process with the land. I found this texture on the net:

Image

Here's something to learn, ANYTHING can be a texture, this is just crinkled paper and when added as a texture will give a more subtle look then the stronger foamy ocean texture I got for the sea. The difference here will be to make sure that the texture for the land is just under the land. You'll need to erase everything else beyond the land. Instead of painstakingly erasing everything you don't want, one of the tricks I've picked up is to right click on the land layer and select "Alpha to selection" this will perfectly select the land. Then go to the image drop downs and select... uh, "Select" :lol: and choose "invert" now everything BUT the land is selected. Now just change layers to the land texture and hit delete, tah-dah perfect cutout of the land texture. Make sure you go back up to "Select" and choose "select none" when finished.

Click image to enlarge.
image


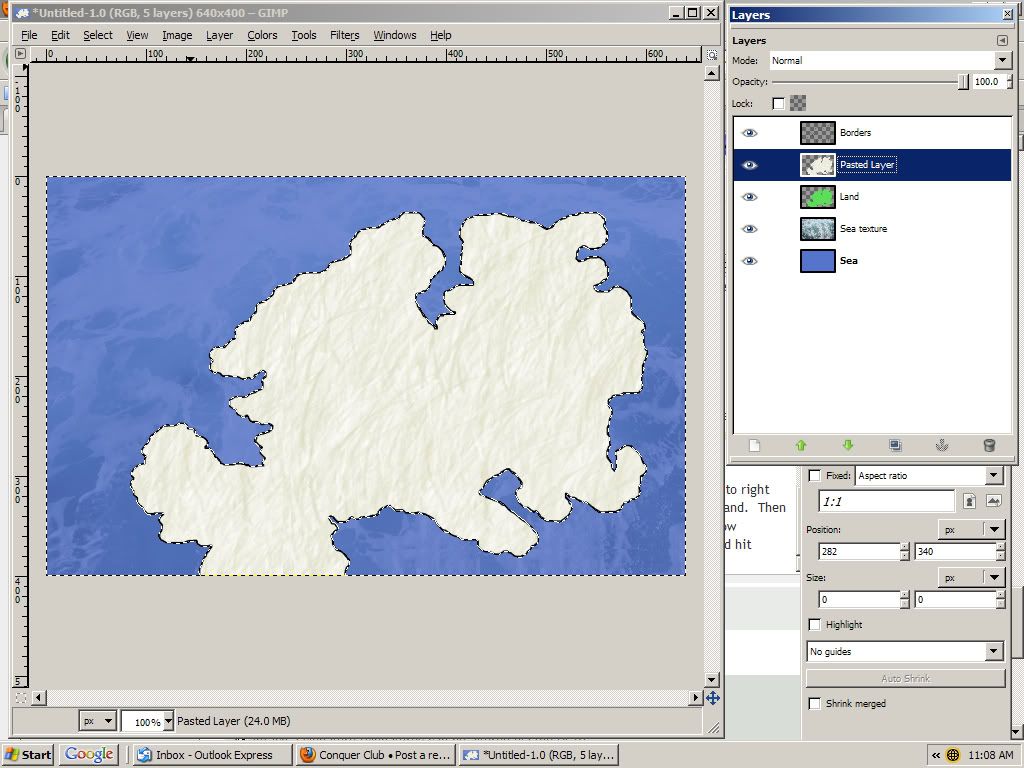
Now just drop the opacity down again, again 30% seemed about right, remember colors blend together here, so notice how much the green color is muted from the original. The biggest trick around here is finding balance that you AND everyone else will like.

Click image to enlarge.
image


Now all you need it territories, bonuses, a legend and patience... ;)

Image

Last thing to remember, the images you find on the net MUST be free to use for you to use on a map of your creation, this is just a guide, not intended for use in a real map, so I didn't have to worry about copyrights since there is no gain to me for using them. Make sure you familiarize yourself with Foundry guidelines about using images and creating maps:


{note: I know this is guide, feel free to move this Foundry mods, just give jleonnn a chance to read it first.}

Re: How do you make lands or seas?

PostPosted: Fri Oct 09, 2009 12:39 am
by jleonnn
thnx man! You should consider working on a few yourself!

Re: How do you make lands or seas?

PostPosted: Fri Oct 09, 2009 7:35 am
by thenobodies80
[Moved]

Well done RedBaron0, a nice guide for starters ;)

=D>

Re: How do you make lands or seas?

PostPosted: Fri Oct 09, 2009 7:53 am
by RjBeals
very nice. good to see some more tutorials around here. Your overlays are similar to this tutorial i posted a while ago:

viewtopic.php?f=466&t=76649

Re: How do you make lands or seas?

PostPosted: Fri Oct 09, 2009 7:54 am
by jleonnn
Tho at that time, I didn't know what opacity meant.

Re: Texture Overlays for Land and Sea

PostPosted: Fri Oct 09, 2009 1:46 pm
by MrBenn
I renamed the thread title to make it a bit clearer ;-)

As others have said, nice guide RedBaron0 ;-)

Re: Texture Overlays for Land and Sea

PostPosted: Fri Oct 09, 2009 2:38 pm
by RedBaron0
Thanks guys, happy to help. Your guide is really good Rj! This guide is using GIMP, but is likely to be pretty similar if you're using Photoshop.

Re: How do you make lands or seas?

PostPosted: Mon Oct 12, 2009 1:44 am
by jleonnn
RedBaron0 wrote:Here's something to learn, ANYTHING can be a texture, this is just crinkled paper and when added as a texture will give a more subtle look then the stronger foamy ocean texture I got for the sea. The difference here will be to make sure that the texture for the land is just under the land. You'll need to erase everything else beyond the land. Instead of painstakingly erasing everything you don't want, one of the tricks I've picked up is to right click on the land layer and select "Alpha to selection" this will perfectly select the land. Then go to the image drop downs and select... uh, "Select" :lol: and choose "invert" now everything BUT the land is selected. Now just change layers to the land texture and hit delete, tah-dah perfect cutout of the land texture. Make sure you go back up to "Select" and choose "select none" when finished...


So I select the borders of the lands, than invert, then delete the layer with the lands. Right? I tried that, the land just became sea colour again.

Re: Texture Overlays for Land and Sea (GIMP)

PostPosted: Mon Oct 12, 2009 2:00 am
by RedBaron0
Not the borders, the land layer right click on the layer in the channel window ->alpha to selection ->invert select ->change layer to the texture ->delete ->select none

Make sure the texture layer is in the right spot when you're changing the opacity. If the texture is below another layer it won't look like you're doing anything at all. If the layer is above, you probably won't get the blended look you should be getting.

Re: Texture Overlays for Land and Sea (GIMP)

PostPosted: Mon Oct 12, 2009 3:20 am
by jleonnn
you mean delete the texture for land? I selected and deleted but I found the entire layer just disappeared and the land went back to normal

Re: Texture Overlays for Land and Sea (GIMP)

PostPosted: Mon Oct 12, 2009 10:43 am
by RedBaron0
Are you hitting the delete layer button on the screen, or the delete button on your keyboard?

Re: Texture Overlays for Land and Sea (GIMP)

PostPosted: Tue Oct 13, 2009 12:39 am
by jleonnn
sorry to bother but what delete layer button?

Re: Texture Overlays for Land and Sea (GIMP)

PostPosted: Tue Oct 13, 2009 1:10 am
by RedBaron0
You'd have to click on the screen to delete a layer. Kinda looks like a mushroom next to the anchor at the bottom of the layers window.

Re: Texture Overlays for Land and Sea (GIMP)

PostPosted: Tue Oct 13, 2009 2:45 am
by jleonnn
k thnx

Re: Texture Overlays for Land and Sea (GIMP)

PostPosted: Fri Oct 23, 2009 4:49 am
by jleonnn
It's a trash bin, isn't it?

Re: Texture Overlays for Land and Sea (GIMP)

PostPosted: Fri Oct 23, 2009 10:00 am
by RedBaron0
I think it technically is, but I think it looks more like a mushroom.

Re: Texture Overlays for Land and Sea (GIMP)

PostPosted: Sat Oct 24, 2009 3:15 am
by jleonnn
ok