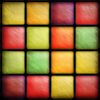
I can provide 3D water/land textures for anyone who needs them for their map project. The water textures (See the Nolmur Island topic in graphting room) I make look good as a background, and I can make nice looking moutains on land textures. If you're simply interested in what I can do, go ahead and say so and I'll get a sample picture.
Please specify color, style, pixel size, and image format. Thanks!
Note: I don't mind it of my name is not included on your finished map, but if you do have a list of credits, please include my name. Thanks!
3D water/land textures?
Moderator: Cartographers
3 posts
• Page 1 of 1
Re: 3D water/land textures?
Could you create a tutorial for how you made your textures?
I'd love to learn how you did it.
I'd love to learn how you did it.

-

 wcaclimbing
- Posts: 5598
- Joined: Fri May 12, 2006 10:09 pm
- Location: In your quantum box....Maybe.


Re: 3D water/land textures?
wcaclimbing wrote:Could you create a tutorial for how you made your textures?
I'd love to learn how you did it.
Well, it's not really simple. I've been using a free downloadable 3D modeling program called Blender3D for at least 4-5 years now. I'll go ahead and write a 5-step tutorial, but some of you will not be able to complete it.
1. Getting Blender: Most important step for getting started, download the latest Blender version with the provided link above (v2.48 currently, but they make a new version like every month). There are some other plugins and neccasary stuff you need to download to make Blender work. Make sure you have everything you need on your comp and test Blender out to make sure it works correctly, it'll let you know in a dialogue box if you don't have everything.
2. Getting Started: Open Blender (by default there's a cube in the center, delete the cube by right clicking on it, then pressing delete), and center the view from the top (click VIEW menu, click TOP), delete the camera by right-clicking and pressing delete. Create a new camera by pressing the Add menu at the top, then clicking Camera. You're going to want this camera set on Orthographic mode, so go into the Editing layout by clicking the square button with a cube pic on it (or simply press F9), then click the button "Orthographic" to turn it on. Also, in the rendering layout (big button says RENDER and another ANIMATE), there is some setting to the far right where you can set the X dimension pixel size, and the Y dimension pixel size. And downwards. you can set the image format and the quality (ALWAYS set quality to 100%).
3. Creating the Water: I'm assuming you want to create water textures here, land textures are alot harder and require more expirience with Blender. So, you should simply want to create a flat four-cornered surface, AKA a "plane". Now make sure you're viewing from the top, and click the Add menu and click Plane. Now adjusting the plane to fit your whole rendering view is going to be tricky, you might need to try scaling the plane up (select the plane, click 'S', then move your mouse to the desired size) and moving the camera (select View menu, click Camera) and changing the camera Scaling. Once you get it adjusted to fit on your screen (make sure by rendering [pressing F12 button] that the water is aligned correctly), you may move to the next step.
4. Texturing the Water: Okay, your going to need to mess with the plane's matierials and textures now. Select the plane (right click) and go into the material layout (button with a red ball icon), and make the material blueish (not too blue, but just enough to look realistic), now look to the far right where there's a 'Texture' module, and click 'Add New'. Now it'll change your layout to the Texturing layout. Select "Clouds" from the menu, and set the 'Noise Size' alot lower (say, .100?). then go back into the Plane's Material layout and in the Texture module to the right, there's a tab called "Map Input", click that, and turn the "Col" button off, and turn the "Nor" button on. There's a bar below where you can set the amount of "Nor" (Basically controls the intensity of the bumpiness of the water waves).
5. Saving your Background Image: You should test it out a few times and render it to make sure you're getting what you want. To render (aka draw, or create) press the F12 button and it should, slowly but surely, draw a image of cool looking water. Now, when you get it looking the way you want, (and make sure you have the image size and image format settings set correctly) click the File menu and click "Save Rendered Image", and then you can set where the image will be stored. Then you may import this image to any graphics program and use it as a background!
I'm sorry if I wrote this confusingly, and if you're stuck along the way and need help, you can PM me. Also, messing around with Blender and getting used to the layout really helps.
You may follow these simple (yeah right) rules, or... Just have me make one for you.
-
 Len44
Len44
- Posts: 15
- Joined: Thu Feb 26, 2009 12:54 am
- Location: Oregon USA
3 posts
• Page 1 of 1
Return to Melting Pot: Map Ideas
Who is online
Users browsing this forum: No registered users

